How to Fine-Tune Your Own Mistral-7B
Fine-tuning Mistral-7B with Alpaca dataset using Google Colab and model tracking using Weight and Bias (WandB)
In the ever-evolving landscape of natural language processing, the emergence of powerful language models has become a defining trend. These models, renowned for their remarkable capabilities in generating coherent text and contextual learning, have spurred a culture of open collaboration among researchers. The practice of releasing both models and accompanying code for training and inference has been firmly established.
Reflecting on the past, the advent of BERT marked a significant milestone. Numerous fine-tuned models swiftly surfaced, each tailored to specific tasks such as document classification, sentiment analysis, and named-entity recognition. The trend continued with the introduction of subsequent large language models like GPT-1, GPT-2, Mistral, Llama, and others. The community shared their model weights, inviting enthusiasts to experiment and apply these advancements.
In the present scenario, the landscape evolves at a rapid pace, with new large language models emerging almost monthly. These models often come with subtle modifications or focus on specific datasets, accompanied by benchmark scores that showcase their capabilities. Curiosity abounds regarding the methodologies employed by other researchers to achieve these feats.
To demystify the process, this tutorial offers a comprehensive guide on creating your own large language model. Using Mistral-7B as an example, the tutorial walks through the steps of fine-tuning on a specific dataset, in this case, the Alpaca instruction-following dataset. The tutorial assumes access to Google Colab GPU T4 for training, acknowledging that while it may not be sufficient for resource-intensive tasks, patience becomes a virtue in such scenarios.
In essence, this narrative unveils the journey of innovation and collaboration within the realm of large language models, inviting enthusiasts to not only explore existing models but also embark on the exciting endeavor of creating and fine-tuning their own. The tale unfolds against the backdrop of ever-advancing technology and the shared pursuit of pushing the boundaries of natural language understanding.
Let’s get into it.
Introduction
As usual, this tutorial consists of common machine learning development.
Prepare datasets
Dataset transformation
Model development
Model evaluation
Publish model
To understand this tutorial, you have to be familiar with Python, Pytorch, and Transformers environment. Ultimately, if you want to modify the process or method, you have to dig down the process and create a custom function or class that you intend to do.
Pre-requisites
Huggingface account, you need this to publish your model into HF hub. In the first step, you must authenticate Google Colab to HF Hub using a token.
The Weight and Bias account is needed to track model loss so that you can compare several experiments in a single chart.
Google Colab, well, this tutorial fine-tuned the model using Google Colab, because it provides a GPU.
Install Libraries
You must install several libraries to be able to train the model.
accelerate is a library that enables the same PyTorch code to be run across any distributed configuration by adding just four lines of code! In short, training and inference at scale are made simple, efficient, and adaptable.
bitsandbytes, accessible large language models via k-bit quantization for PyTorch.
datasets is a library for easily accessing, sharing, and processing datasets for Audio, Computer Vision, and Natural Language Processing (NLP) tasks.
peft which stands for Parameter-Efficient Fine-Tuning is a library for efficiently adapting large pre-trained models to various downstream applications without fine-tuning all of a model’s parameters because it is prohibitively costly.
transformers provide APIs and tools to easily download and train state-of-the-art pre-trained models.
tokenizers, is a text preprocessing tool that converts free text into tokens and supporting parameters for transformer-based models.
sentencepiece is a library that is needed by tokenizers to tokenize text.
wandb is a library used for model tracking.
!pip install -q -U accelerate bitsandbytes datasets peft transformers tokenizers sentencepiece wandbSetup Authorization
from huggingface_hub.hf_api import HfFolder
HfFolder.save_token(<HF TOKEN>)
import os
os.environ["WANDB_API_KEY"] = "WANDB_KEY"
os.environ["WANDB_PROJECT"] = "Mistral-7B-v0.1-finetune-alpaca"
os.environ["WANDB_LOG_MODEL"] = "checkpoint"import wandb
wandb.login()Load Modules
import torch
from datasets import load_dataset
from transformers import AutoModelForCausalLM, AutoTokenizer, TrainingArguments, Trainer, BitsAndBytesConfig
from transformers import DataCollatorForSeq2Seq
from peft import prepare_model_for_kbit_training, LoraConfig, get_peft_model
Load Dataset
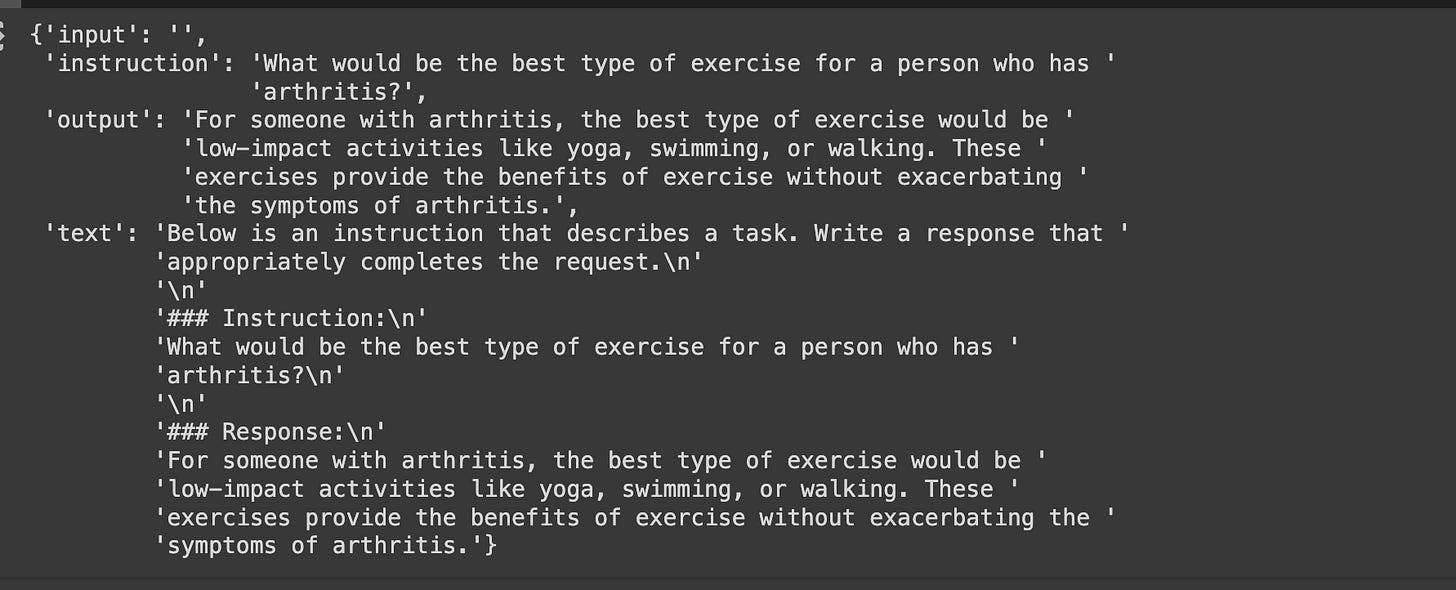
Alpaca is an English instruction-following dataset that is generated by OpenAI’s engine called text-davinci-003. The instruction data can be used to run instruction-tunning for LLMs and make a better model to follow instructions. The official page also claims Alpaca-7B (Llama-2 fine-tuned on this dataset) produces outputs similar to text-davinci-003 with low cost. The dataset has 4 columns:
Instruction contains a direction on what the model should product
Input is an additional context that the model to understand.
Output is the expected generated text
Text is a combination of 3 columns and formatted specifically for the instruction-following. So, this format will also be used in inference.
dataset = load_dataset("tatsu-lab/alpaca")Split dataset
dataset_split = dataset['train'].train_test_split(test_size=0.2, seed=42)dataset_split['train'][0]Output:
{'input': '',
 'instruction': 'What is the periodic element for atomic number 17?',
 'output': 'The periodic element for atomic number 17 is Chlorine.',
 'text': 'Below is an instruction that describes a task. Write a response that '
         'appropriately completes the request.\n'
         '\n'
         '### Instruction:\n'
         'What is the periodic element for atomic number 17?\n'
         '\n'
         '### Response:\n'
'The periodic element for atomic number 17 is Chlorine.'}dataset_split['test'][0]Load Model
In this tutorial, we use Mistral-7B which is trained for next-word prediction. So, we need to fine-tune the instruction dataset for the model to be able to answer the prompt. The mistral also provides a fine-tuned one called Mistral-7B-instruct-v.*, which is the model that is on a similar level that we gonna fine-tuned.
modelpath = "mistralai/Mistral-7B-v0.1"Next, we need to define the BnB config for quantization, this helps to consume less memory. BnB Config will be used if you enable GPU otherwise the config is None.
is_cuda_available = torch.cuda.is_available()
if is_cuda_available:
    print(f"is_cuda_available: {is_cuda_available}")
    bnb_config = BitsAndBytesConfig(
        load_in_4bit = True,
        bnb_4bit_compute_dtype=torch.bfloat16,
        bnb_4bit_quant_type="nf4"
    )
else:
    bnb_config = None
Load the Mistral weights to the model. device_map is auto to map the device that you have automatically. It is automatically loaded to the GPU. torch_dtype is specified to use 16 bits, this cuts half of the memory.
model = AutoModelForCausalLM.from_pretrained(
    modelpath,
    device_map="auto",
    quantization_config=bnb_config,
    torch_dtype=torch.bfloat16
)
Then, we need to convert the quantized model to LoRA. prepare_model_for_kbit_training This method wraps the entire protocol for preparing a model before running a training. This includes:
Cast the layernorm in fp32
making output embedding layer requires grads
Add the upcasting of the LM head to fp32
model = prepare_model_for_kbit_training(model)Setup LoRA Configuration
lora_config = LoraConfig(
    r=64,
    lora_alpha=16,
    target_modules = ['q_proj', 'k_proj', 'down_proj', 'v_proj', 'gate_proj', 'o_proj', 'up_proj'],
    lora_dropout = 0.1,
    bias="none",
    modules_to_save=["lm_head", "embed_tokens"],
    task_type="CAUSAL_LM"
)
model = get_peft_model(model, lora_config)
model.config.use_cache = False
Load Tokenizer
tokenizer = AutoTokenizer.from_pretrained(modelpath)tokenizer.pad_token = '[PAD]'def tokenize(row):
result = tokenizer(
row["text"],
truncation=True,
max_length=2048,
add_special_tokens=False
)
result['labels'] = result['input_ids'].copy()
return resultDue to computational resources limitation, we only sample 100 instances each for train and test.
train_sample = dataset_split['train'].select(range(100))
test_sample = dataset_split['test'].select(range(100))
Then, we tokenized the samples
train_sample_tokenized = train_sample.map(tokenize)
test_sample_tokenized = test_sample.map(tokenize)
Then format the list of ids to Tensor and select columns that are needed for transformer.
train_sample_tokenized.set_format(type="torch", columns=["input_ids", "attention_mask", "labels"])
test_sample_tokenized.set_format(type="torch", columns=["input_ids", "attention_mask", "labels"])
collate_fn = DataCollatorForSeq2Seq(tokenizer, return_tensors="pt", padding=True)
Prepare Training
BATCH_SIZE = 2
EPOCH = 3
REPORT = "wandb"
STEPS_PER_EPOCH = len(train_sample_tokenized) // BATCH_SIZE
args = TrainingArguments(
output_dir=f"{modelpath}-finetune-alpaca",
report_to=REPORT,
per_device_train_batch_size=BATCH_SIZE,
per_device_eval_batch_size=BATCH_SIZE,
evaluation_strategy="steps",
logging_steps=1,
eval_steps=STEPS_PER_EPOCH,
num_train_epochs=EPOCH,
lr_scheduler_type="constant",
optim="paged_adamw_32bit",
learning_rate=1e-4,
group_by_length=True,
fp16=True,
ddp_find_unused_parameters=False
)Calculate the steps for train and test, this will give you an estimation of how many steps to run all the data.
print("Train steps:", train_sample_tokenized.num_rows // BATCH_SIZE)
print("Test steps:", test_sample_tokenized.num_rows // BATCH_SIZE)
Input all the prepared model, tokenizer, dataset, and arguments into Trainer()
trainer = Trainer(
    model=model,
    tokenizer=tokenizer,
    data_collator=collate_fn,
    train_dataset=train_sample_tokenized,
    eval_dataset=test_sample_tokenized,
    args=args
)
Time to train the model
trainer.train()
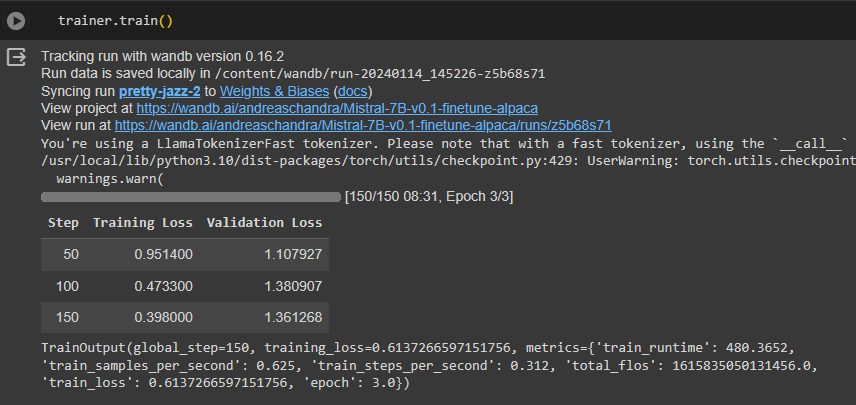
The training progress would look something like this
Upload fine-tuned model to huggingface hub
trainer.push_to_hub()Common Issues & Troubleshooting
Out of memory, you need to adjust the variable BATCH_SIZE. As defined above, the BATCH_SIZE is 2, it works on T4. But, if you have lower GPU memory, then you must set BATCH_SIZE = 1, if you still encounter “unable to locate memory”, it simply the device is not enough to train Mistral-7B.
Conclusion
To conclude, in this tutorial, we explored how to fine-tune Mistral with the Alpaca Instruction-Tuning dataset on Google Colab. We covered the following key steps:
Setting up the environment, including installing the necessary packages and authentication.
Loading and preprocessing the Alpaca Instruction-Tuning dataset, including tokenizing the data.
Configuring the LLaMA 2 model for fine-tuning, including setting up the model's hyperparameters and pre-processing the inputs. It needs more exploration of the hyperparameters to find the best output.
Training the fine-tuned model, including monitoring the model's performance and saving the model for future use.
Throughout this tutorial, we emphasized the importance of carefully preprocessing the data, selecting appropriate hyperparameters, and monitoring the model's performance during training.
Next, we will cover the evaluation benchmark on several datasets.


